What Is Automatic Cursor Zoom (And Why Every Tutorial Video Needs It)

You hit record. You click around your app. You stop, watch the result back, and the cursor is invisible — a tiny grey arrow drifting across a 4K screen, impossible to follow on a phone. The recording is technically correct and practically useless.
This is the single most common complaint about screen recordings, and it is the problem automatic cursor zoom was built to solve. If you have never used it, the feature sounds minor. Once you have, every recording without it looks broken.
What automatic cursor zoom actually does
Automatic cursor zoom is a post-recording effect that watches where your cursor moved and clicked during capture, then generates zoom keyframes around each click. The result: every time you interact with the UI, the viewer's view zooms in on the interaction; between clicks, the view zooms back out so the viewer keeps spatial context.
Three things happen in sequence on every click:
- Ease-in — over 200–400 ms, the view zooms toward the cursor.
- Hold — the view stays zoomed for as long as the cursor stays in the area (or for a fixed window like 1.5 seconds).
- Ease-out — the view pans back to full size, ready for the next action.
This is sometimes called automatic zoom, cursor-anchored zoom, or click-triggered zoom. They all describe the same effect. Without automatic zoom, viewers scan the screen looking for the cursor. With it, the camera does the work for them — attention follows the zoom, not the cursor. That is the entire point.
Why it works (the eye-tracking explanation)
Studies on tutorial videos consistently show one finding: viewer attention follows motion. When the entire frame zooms toward a single point, attention locks on that point automatically. Without the zoom, viewers spend the first second of every cut hunting for what changed, then react to whatever the cursor is doing — and by then they have already missed the click.
The effect is most dramatic on three viewing contexts:
- Mobile — phone screens are roughly 1/8th the area of a desktop. A 16-pixel cursor on a 4K recording is unreadable.
- Landing-page embeds — demo videos at 480p height cannot show a 1920-wide UI clearly without zoom.
- Social feeds (LinkedIn, X, TikTok) — autoplay video with no sound and small player. Zoom is what makes the content legible at all.
How automatic zoom is generated
In a recorder built around this feature, the workflow is:
- The recorder captures cursor coordinates at every frame (60 Hz on most modern setups).
- The recorder logs mouse-down and mouse-up events with timestamps.
- After capture, the editor walks the click log and inserts a zoom keyframe at each click location.
- The user can adjust each zoom: amount, animation style, hold duration, and whether to keep or remove it.
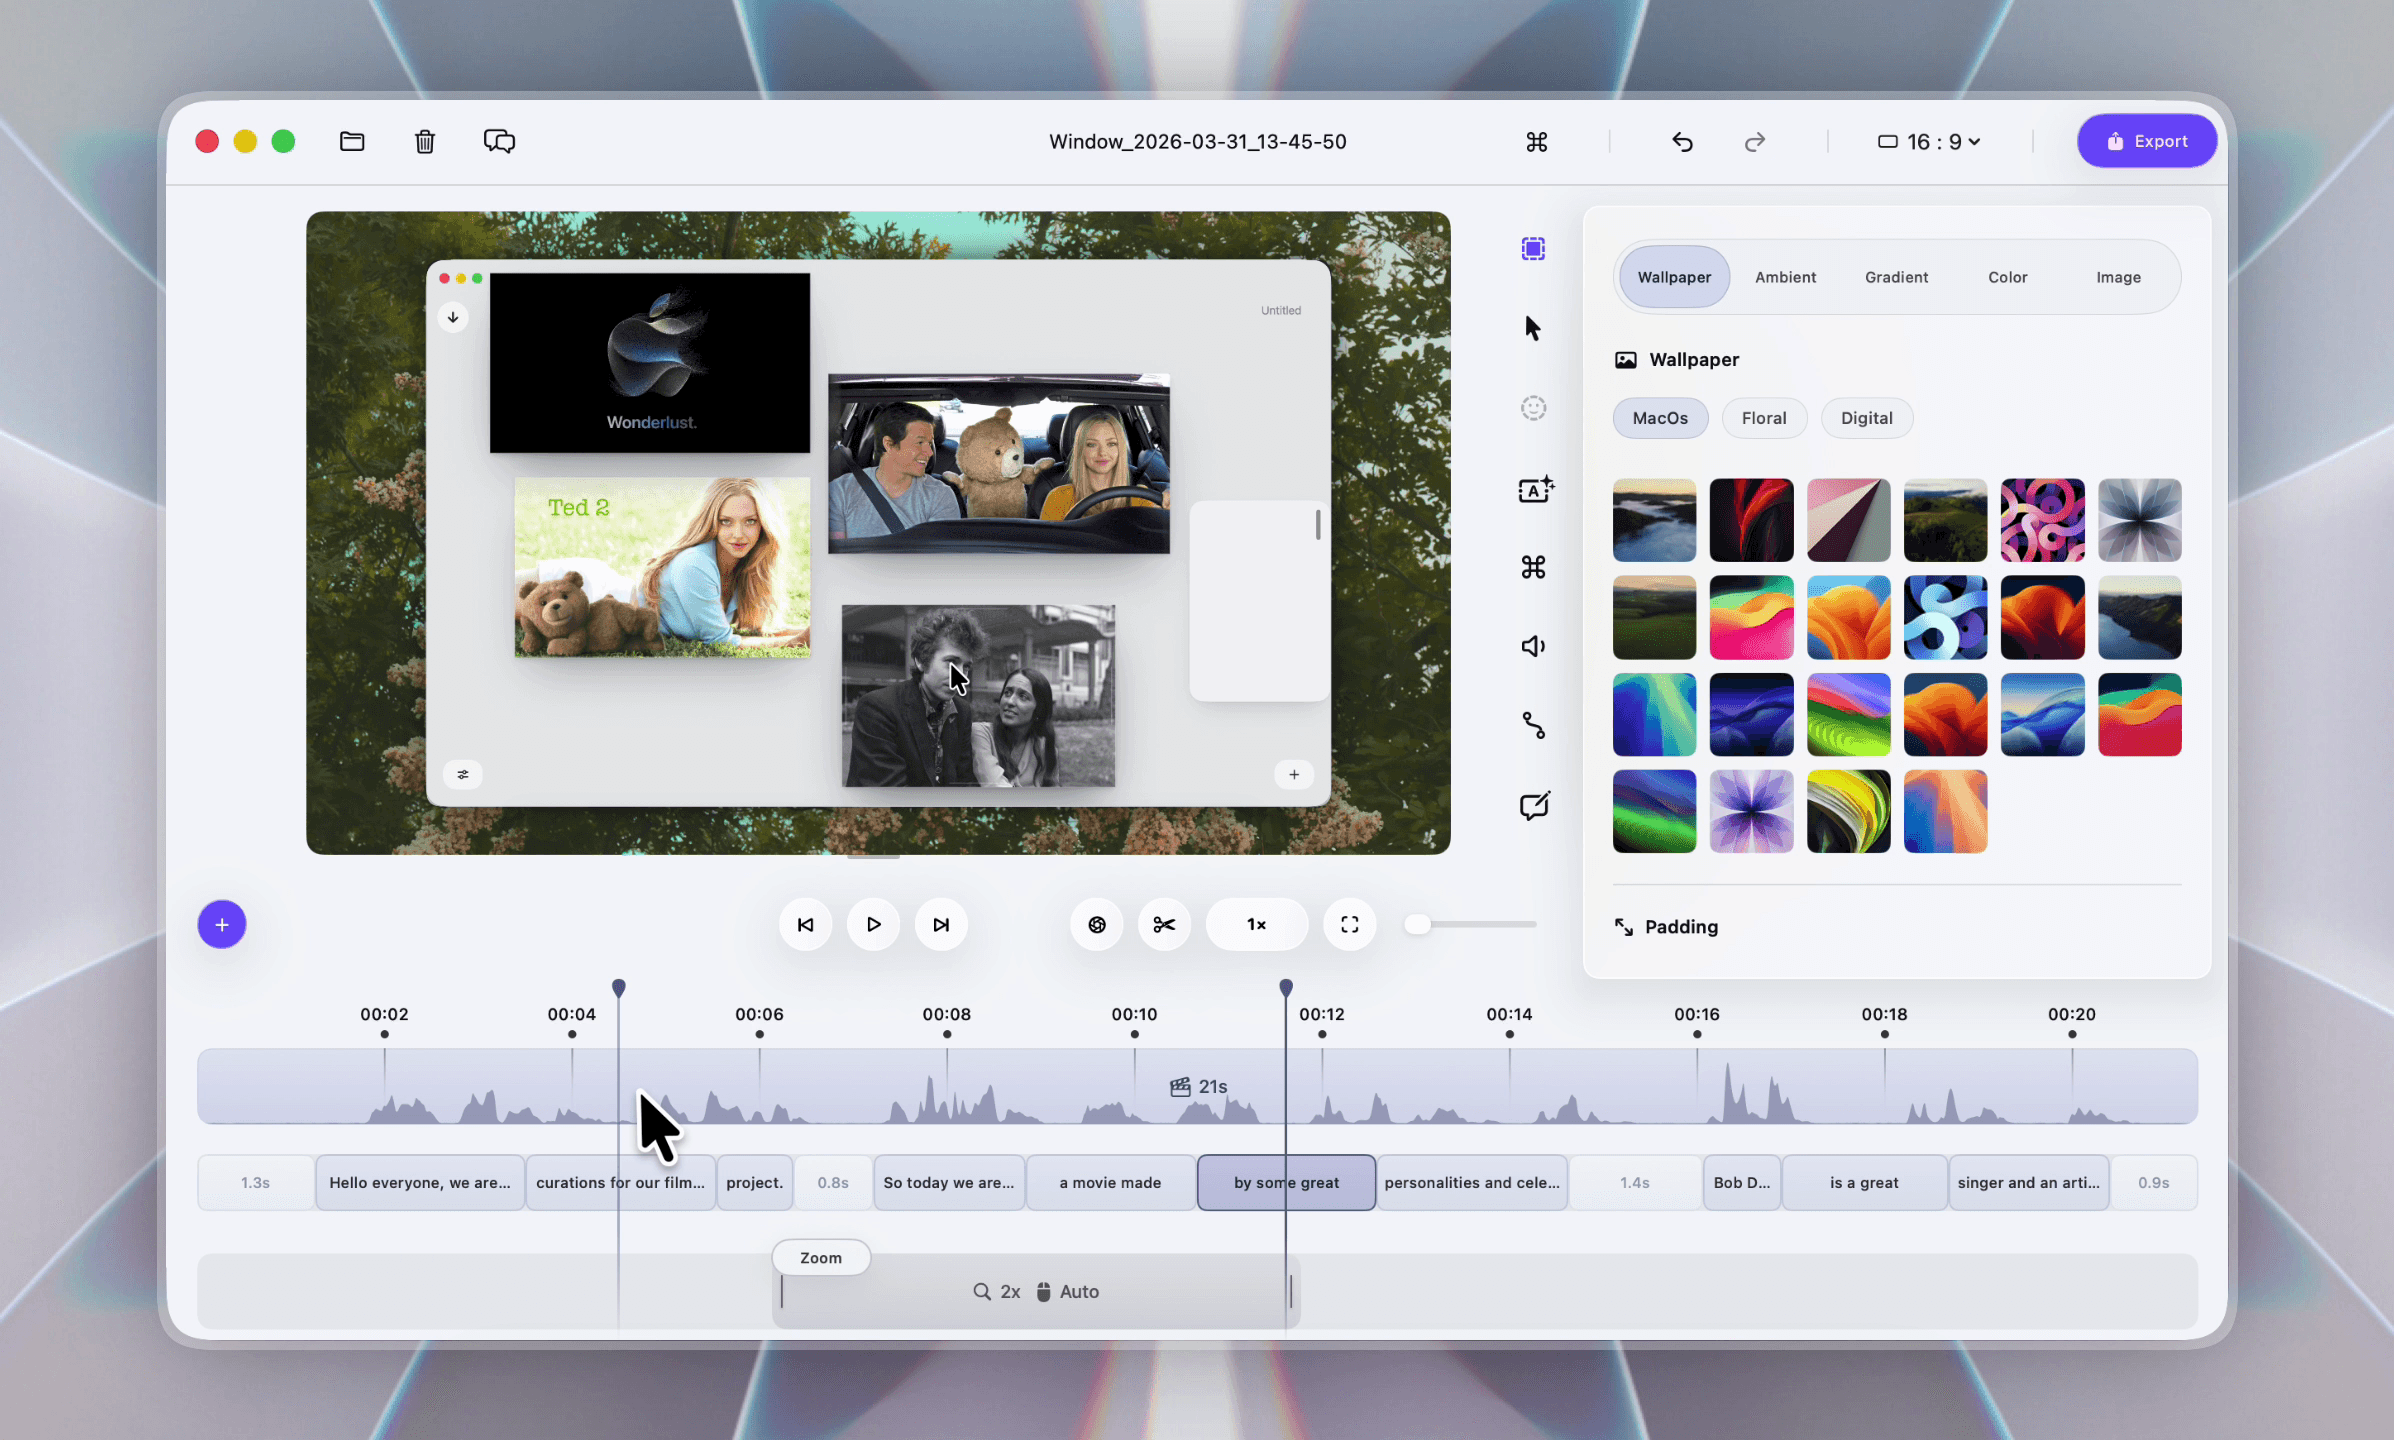
In Dina, this happens automatically the moment a recording opens in the editor. Every click becomes a zoom point on the timeline that you can preview, adjust, or delete. The zoom amount defaults to 1.8× and animates with a "Smooth" preset — both are configurable per zoom.
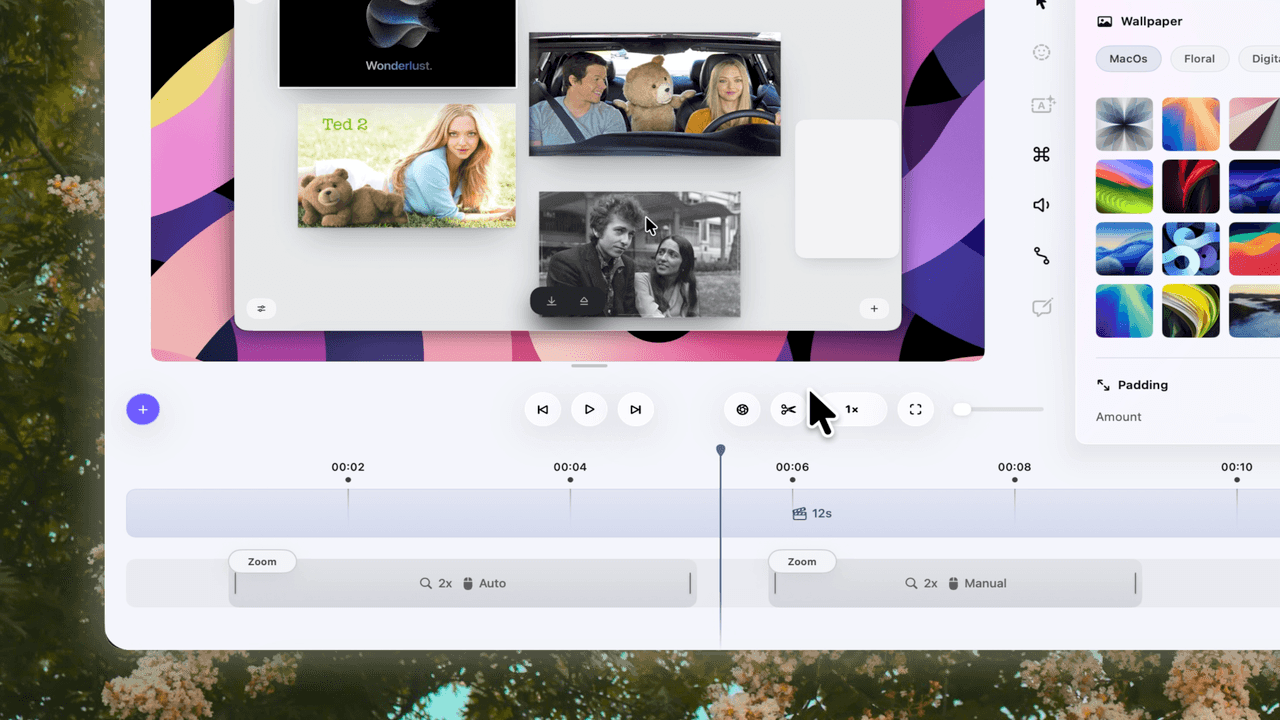
You can also switch to Auto zoom mode, where the view tracks the cursor continuously rather than anchoring at click points. This is useful for demos where you are mostly hovering (not clicking) over UI elements — for example, walking through a chart or pointing at a label.
For everything else, Manual zoom lets you place a zoom at any timeline position and pick its target point on the frame.
What "good" automatic zoom feels like
A well-tuned automatic zoom has three properties:
- You barely notice it. Good zoom feels like a documentary camera operator — invisible until you stop watching the content.
- It always lands on something meaningful. A zoom on an empty area of the screen feels like a glitch. A zoom on a clicked button feels intentional.
- It pans out before the next click. Two zooms in quick succession without a pan-out feel claustrophobic.
A poorly-tuned automatic zoom does the opposite — zooms too aggressively (over 2.5×), holds too long, or fires on every micro-movement of the cursor.
The right zoom amount, animation, and timing
If you remember nothing else from this article:
| Setting | Sweet spot | Why |
|---|---|---|
| Zoom amount | 1.6×–2.2× | Below 1.5× is barely visible. Above 2.5× crops out context. |
| Ease-in duration | 280–360 ms | Fast enough to feel responsive, slow enough to feel cinematic. |
| Hold duration | 1.0–1.8 seconds | Matches average reading time for a UI element. |
| Ease-out duration | 320–480 ms | Slightly slower than the zoom-in, which feels more relaxed. |
| Style | Smooth (for most content) | "Focus" works for high-energy demos, "Smooth" for tutorials. |
These defaults work for ~90% of recordings. The other 10% — high-density UIs, very short clips, or animation-heavy apps — benefit from manual tweaking.
 Adjusting zoom amount and style in Dina
When to use manual zoom instead
Automatic zoom is excellent for click-driven workflows, but a few situations call for manual control:
- Drawing attention to a non-clicked element — a chart, a notification, a status indicator. Drop a manual zoom on the timeline pointing at that element.
- Walking through a long form without clicking — automatic zoom would either ignore the form entirely or fire too rarely. A single slow zoom across the form reads better.
- Pulling the camera back for context — sometimes you want the opposite: a manual "zoom out" keyframe to show the whole UI before zooming back in for the next click.
Dina supports both modes side-by-side. Automatic zooms appear on the timeline as one colour, manual zooms appear as another — you can delete any auto zoom and replace it with a manual one without affecting the rest.
Common mistakes to avoid
A few patterns that show up in beginner recordings:
- Letting every click trigger a zoom. A demo with 30 clicks does not need 30 zooms. Delete the zooms on minor interactions (closing menus, scrolling).
- Using the same zoom amount everywhere. A button click might warrant 1.6×; a tiny icon click might need 2.2×. Vary by content.
- Zooming on a recording shot in 720p. Automatic zoom assumes a high-resolution source. If you recorded at 720p, every zoom will pixelate. Always record at the highest resolution your screen supports.
- Mixing automatic zoom with motion-heavy backgrounds. If you have animated wallpapers or moving backgrounds, the combined motion can feel disorienting. Pick one.
Beyond zoom: cursor styling and smooth movement
Automatic zoom is one of three "cinema-grade" effects that, used together, transform a raw recording into a polished one. The other two:
- Smooth cursor movement — the cursor's path is interpolated to feel intentional, not jittery. Even sloppy real-world cursor movement looks confident on playback.
- Cursor highlight / styling — increase the cursor size to 1.2×–1.4×, add a subtle motion blur, or switch to a custom cursor style (iPad-pointer for software, custom shapes for branding).
In Dina, all three are configurable independently. Smooth cursor has presets (Smooth, Medium, Rapid, None), motion blur amount is a slider, and cursor style has system, custom, and iPad pointer options.
FAQ
Which screen recorder for Mac has automatic cursor zoom?
In 2026, the two mainstream Mac screen recorders with built-in automatic cursor zoom are Dina and Screen Studio. Other tools (Loom, QuickTime, ScreenFlow, Camtasia, OBS) require manual keyframe zooms, which add roughly 10–15 minutes of editing per tutorial.
Can I add automatic zoom to a recording I already made?
Yes — if the recording was made with a recorder that logs cursor data alongside the video (Dina does this automatically). For raw .mov or .mp4 files made with QuickTime or OBS, automatic zoom is not possible because there is no cursor event data to anchor zooms to. You can only add manual zooms in a traditional editor.
What is the best zoom amount for a tutorial video?
1.6× to 2.2×. Below 1.5× the zoom is too subtle to help the viewer. Above 2.5× you crop out too much context and the recording feels claustrophobic. 1.8× is a safe default for most demos.
Does automatic zoom work on 4K recordings?
Yes — automatic zoom is most effective on high-resolution recordings. The whole point of the effect is to make small UI elements readable, and a 4K source gives the zoom enough pixel detail to hold up without blurring. Recording at native 4K and exporting at 1080p with automatic zoom is the highest-quality workflow available in 2026.
Is automatic cursor zoom the same as motion tracking?
No. Motion tracking follows a specific object in the frame regardless of where the cursor is. Automatic cursor zoom anchors specifically to the cursor's coordinates and click events. They produce similar visual effects but use different data. For screen recordings, cursor anchoring is far more reliable than tracking because the cursor's exact position is known down to the pixel.
Will automatic zoom slow down my Mac during recording?
No. Modern automatic zoom is applied during post-production, not during capture. The recorder writes raw video + cursor metadata; the zoom is rendered when you preview or export. On Apple Silicon Macs (M1 and newer), even 4K recordings with multiple zoom layers preview at full frame rate.
Why it matters
Automatic cursor zoom is the single feature that separates a forgettable screen recording from a tutorial people actually watch to the end. If your current recorder does not have it, every video you ship is harder to watch than it needs to be.
Try Dina free for 7 days — automatic zoom is on by default for new recordings, with adjustable amount and animation style on every zoom point. Record one tutorial with it. Compare it to your last one without it. The difference shows up immediately.

Ready when you are.
Create polished videos with precision, speed, and clarity.